What do you Need? A (Disposable) Cup Filled with Water of 22-24 ºC, Nail Polish Remover, Adhesive Tape, Scissor, White (Base) Color Nail Polish, Minimum of 2 Nail Polish Colors of Your Choice, Base coat, (Glitter/Matte) Top Coat, Toothpicks and Cotton Swabs.
As Always When you Paint your Nails First: Put a Layer of Base Coat on it.
Paint yours Nails White, I Recommend 2 Layers.
Put Tape Around your Nails and Cuticles to make the Cleanup Easier Later on. Be Sure that the Tape does Not Touch the Nail.
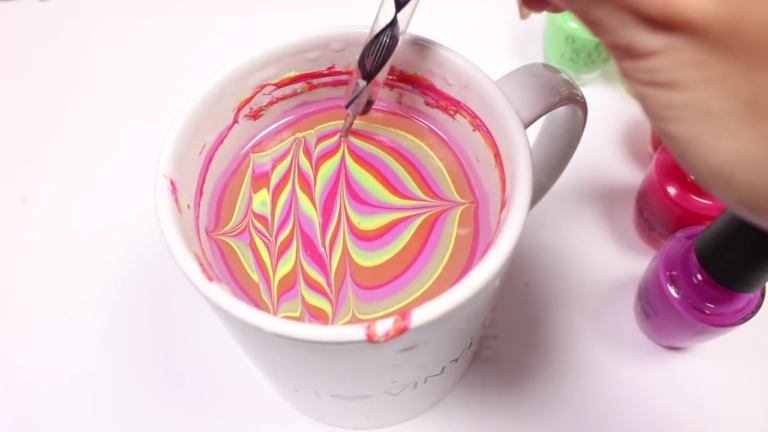
Put One Drop of Nail Polish in the Center of the (Disposable) Cup Filled with Water at Room Temperature. If you take Chilled Water then Nail Polish will Not Spread Perfectly. Also if you take Warm Water then the Nail Polish Circles will Break While Dropping Nail Polish. Drop then the Other Color in the Center of the First Drop. Drop then the Other Color in the Center of the Second Drop, etc.
Place the Toothpick on the Water. Drag the Toothpick Towards the Centre of the Nail Polish of Straight to the End. Then From a Other Side. Continue in This Way in Order to Make a Flower Pattern or just Stripes.
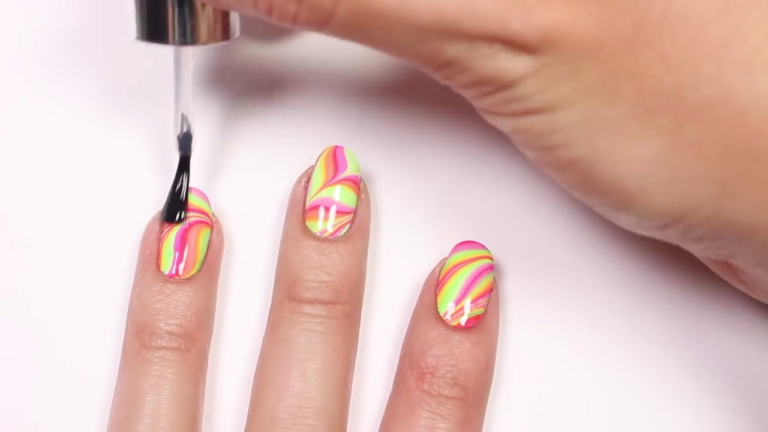
Put your Finger(s) Straight, Not Curved, in the Flower Pattern and Use a Clean Toothpick to Roll Around the Unused Flower Pattern to Pick it Up. Then Take your Finger(s) Out of the Cup, Slowly.
Leave it to Dry. Carefully Peel Off the Tape from your Finger(s).
Dip a Cotton Swab in the Nail Polish Remover. Wipe Around your Nails to Remove Any Spilt Nail Polish. Be Carefull Around the Cuticles.
As Always When you Paint your Nails Last: Put a Layer of (Glitter/Matte) Top Coat on it.